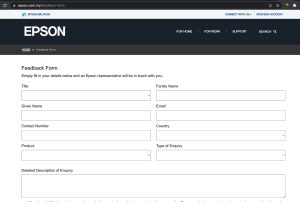
My Epson Ecotank printer didn’t print color correctly and couldn’t solve it when I search on the internet. So I decided to contact Epson Support Centre by filling up their web form.
We had our short vacation during the long Hari Raya Haji public holiday from 29/06/2023 till 02/07/2023. We stayed at Lotus Resort & Spa, Desaru, Johor.
We chose Lotus because all other hotels were fully booked. We were disappointed because had to choose Lotus but at the end we had very enjoyable stay and we gave 5 stars for the welcoming and friendly staff and the room was really nice and we did few activities inside the hotel.
Hotel Surrounding
lotus resort and spa desaru in front of lobbylotus resort and spa desaru johor – lobbylotus resort and spa – easy to get buggylotus resort spa – award certificates
Breakfast with lots of Choices
breakfast di lotus resort desarufree breakfast at lotus desarulotus resort and spa – having our breakfast
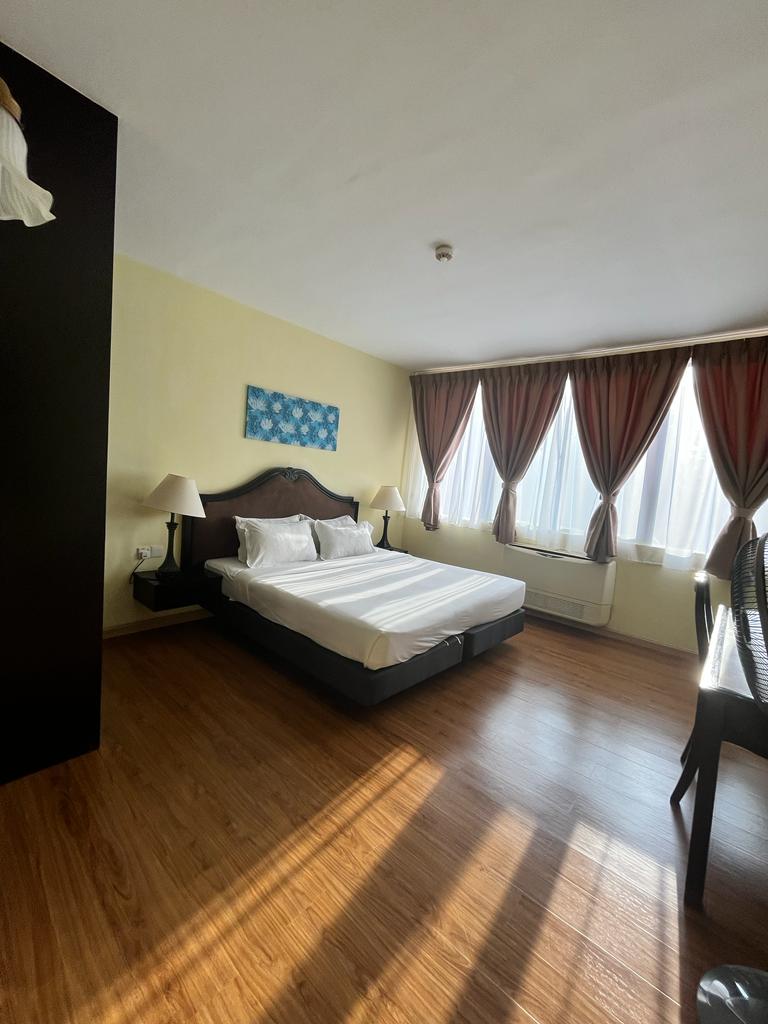
Rooms
master bedroom lotus resort
Activities
mandi di swimming pool lotus resortmain paintball target shooting
Beach
private beach at lotus desaru
Cleanliness
The hotel was really sparkling clean!
lotus resort and spa desaru johorlotus resort and spa activities desaru johor
Fast Response To Replace Faulty TV
Lotus Resort & Spa Desaru Johor
Price
For 3 bedrooms, with a kitchen, living room and dining table it costs us RM2,710 for 3 nights including service tax.
We had our short vacation during the long Hari Raya Haji public holiday from 29/06/2023 till 02/07/2023.
We went to Desaru, Johor. It was our first time went there and decided to stay at Lotus Resort & Spa because other hotels were fully booked.
1) Thursday 29/06/2023
We had our breakfast at Family Mart, Denai Alam before traveling to Desaru around 1030AM.
We arrived at Lotus Resort & Spa around 3.00PM. It was full of visitors at the lobby and hard to get parking.
lotus resort and spa desaru johor – lobby
We stayed at a 3 bedrooms with 2 bathrooms unit. The place was really clean.
While waiting for check in, the kids were looking at the birds cage near the hotel lobby.
living hall 3 bedrooms lotus resortmaster bedroom lotus resort
At night we ate at mamak restaurant called Ehsan and had our icecream at Iceyoo.
icecream milo iceyoo
2) Friday – 30/06/2023
After having our breakfast at the hotel, we played at the Splash water park which was located inside the hotel area.
breakfast di lotus resort desarulotus resort lazy river
We had our lunch at Marry Brown nearby the Lotus hotel.
Then we went to look around at the public beach, went to Hard Rock and Anantara hotel compound.
We inquired about the entry ticket to Desaru Water park. Then we decided to buy entry tickets for Saturday activity.
After buying the ticket we had paintball target shooting just for fun.
main paintballmain paintball target shooting
Then in the evening the kids went to swim at Lotus swimming pool.
mandi di swimming pool lotus resort
At night we ate at different mamak restaurant but the first mamak restaurant @ Ehsan was more delicious.
After that we ate durian at the nearby stalls. They charged RM38 per kg for D24 durian. It was really delicious.
durian d24 di bandar penawar desaru johormakan durian d24 kat bandar penawar
3) Saturday – 01/07/2023
We went to Desaru water park, surprisingly not so many visitors to the park but the park was 3 times better than Legoland water park. We really enjoyed it. Entry fee was RM96 per adult and RM92 for kids below 12 years old.
pergi ke desaru waterpark
For lunch, we had burgers at Desaru water park. The burger was really delicious because it was provided by Hard Rock cafe. The burger meal costs around RM30 – RM38 per meal including soft drinks and wedges.
We played at the water park till around 5PM. It was really tiring but really exciting.
For dinner, we went to SDS Cafe and Bakery. The nasi goreng kampung, spaghetti were really delicious and at affordable price around RM14 per plate.
4) Sunday 02/07/2023
We went to the Lotus private beach. The beach was small not really interesting but my kids love to collect sea shells.
After beach around 930AM, my kids went again to Splash water park.
After checking out, we ate Iceyoo chocholate ice cream and buys lots of SDS breads because it was delicious, you can’t find SDS outlet in Selangor.
For lunch, we went to our favorites Indian restaurant 7 spices and dinner we ate A&W near Ayer Keroh Over bridge.
makan tengahari kat 7 spices
We reached home around 12AM and everyone was really tired.
Factory pattern is a well known creator pattern. Problem with factory pattern is whenever there is a new concrete class that will be instantiate by the creator class (that have factory method), you have to add new ‘case’ in a switch or if / else.
So this violate the Open Close Principle which states open for extensions but close for modifications.
Code below using typescript, but the concept is same for other programming language.
Factory Pattern with Switch or If Else
Factory pattern with switch
1
2
3
4
5
6
7
8
9
10
11
12
13
14
15
16
publicstaticcreate(shape:string):Shape{
switch(type){
case'circle':
returnnewCircle();
case'rectangle':
returnnewRectangle();
case'triangle':
returnnewTriangle()
default:
throwError(`Shape isnotsupported`);
}
}
If you want to add Square shape, we need to add another case in the factory.
factory pattern - another case
1
2
case'square':
returnnewSquare()
The concept is the same with If Else
So I need to open my factory class every time there is a new shape to be add in.
Factory Pattern without Switch & If / Else
There are 3 main classes
1) Factory class
– it will import the shape class files in the folder /shapes
– instantiate the object based on shape type
2) Shape abstract class
– abstract method of getType()
3) Shape concrete class
– implement the getType() to tell what type is the shape e.g round
– located in /shapes folder
The concrete class Shape will implement a function to tell it is what kind of Shape.
Factory pattern - class shape
1
2
3
4
5
6
7
8
9
classabstractShape{
publicabstractgetType():string;
}
classRoundextendsShape{
publicgetType():string{
return'round'
}
}
The factory class will import all the shape file path and instantiate the object when call by user class.
factory pattern - dynamic without if else or switch
Baru-baru ini, tiba-tiba air mengalir dari tempat terletaknya tangki air rumah saya.
Memandangkan banyak juga air yang mengalir saya memanggil “plumber” yang saya baru kenal. Saya namakan dia plumber #1.
siling lembab air bocor dari lantai tangki airair bocor melimpah sampai ke lantaiair bocor dari dinding tempat tangki air
Plumber #1 – Air Tangki Bocor!
Setiap kali, ada kerosakan saya akan minta plumber atau handyman untuk tunjukkan gambar dan video benda yang rosak.
Plumber #1 mengatakan selepas check tangki air bocor dan menunjukkan video lantai penuh dengan air. Saya tanya tak nampak pun air bocor dari tangki. Dia cakap ada bila rasa pakai tangan tapi tak dapat nak ambik gambar.
Dia cakap untuk replace tangki air yang bocor RM2,500. Dia bagi murah RM2,200. Saya tanya dia kenapa tak boleh tampal.
Plumber #1 cakap kalo bocor kat bawah tampal tak tahan lama. Mula-mula saya tak nak ambil, saya nak tunggu hari Ahad je bila plumber yang saya percayai @ Rudy available untuk membuat pemeriksaan. Tetapi memandangkan air banyak jugak mengalir saya membuat keputusan untuk mengupah plumber #1. Cuma syarat saya dia keluar duit semua dulu dan dah siap saya bayar.
Saya cakap terus terang saya baru kenal dia jadi kepercayaan tu tak ada lagi.
Selepas dia balik tak lama lepas itu, dia telefon saya, tangki boleh tampal. Saya tanya dia balik, tadi cakap tak boleh tampal. Plumber #1 cakap dia ada kawan expert boleh tampal hanya RM1,000. (dalam hati saya tampal selalunya orang minta RM400 je)
Selepas dia cakap cam tu saya terus cakap cancel kerja repair saya minta second opinion. Kemudian dia cakap dia bagi RM850. Saya bertegas tak nak proceed.
Plumber #2 – Membuat Pemeriksaan & Paip yang Bocor
Plumber #2 iaitu Rudy siap ambil video dan bagitau yang paip yang bocor dan tangki air tak bocor antara buktinya panel kayu tempat duduk tangki air adalah kering.
Kesimpulan
Hati-hati bila ambil plumber baru dan tiba-tiba nak caj mahal. Lagi baik dapatkan second opinion. Biorlah lambat dari rugi beribu ringgit.
Plumber #2 – Rudy hanya kenakan bayaran RM180 sahaja vs plumber #1 RM2,200.
I installed XAMPP then after installation the XAMPP control manager appeared after that. If you restart your computer, I wonder where I can launch it because XAMPP is not appeared in LaunchPad.
Applications folder of XAMPP also has so many files.
How To Launch XAMPP?
Go to Applications -> XAMPP -> xamppfiles .
Then click on manager-osx.
Key in your password and then the XAMPP control manager will appear.
I had color printing problem with my Epson Ecotank L3150 printer. When I print color, it became pinky only.
How To Solve Color Printing Problem on Epson L3150?
1) How To Access Head or Power Cleaning in Windows or MacOS?
MAINTENANCE CLEANING: for WINDOWS OPERATING SYSTEM
1. Go to Start Menu
2. Search control panel > Devices and printers
3. Look for the model of your printer
4. Right click on the printer then click on printing preferences.
5. Go to maintenance tab.
6. Click on head cleaning then click on START.
(Take note: Print head cleaning usually takes 3 to 5 minutes, after the print head cleaning do some test print to see if there are improvements on the print out. If still the same do the head cleaning up to 3x
If Print head cleaning didn’t work proceed to Power cleaning
Power Cleaning
1. Go to Start Menu
2. Search control panel > Devices and printers
3. Look for the model of your printer
4. Right click on the printer then click on printing preferences.
5. Go to maintenance tab.
6. Click on Power cleaning / Power ink flushing then click on START.
(Take note: Power cleaning / Power ink flushing may takes 10 to 15 minutes, after the Cleaning/Flushing, advised customer to rest the printer for 1 hour to rest, after an hour do some test print. If still the same, advised customer to bring the unit down to our ASP for service or Create Job request if unit is eligible for Onsite support)”
MAINTENANCE CLEANING: for MACINTOSH OPERATING SYSTEM
1. Go to System Preference
2. Search Printers & Scanners
3. Look for the model of your printer
4. Select on the printer name then click on options and supplies.
5. Choose utilities then open printer utilities.
6. Click on head cleaning then click on START.
(Take note: Print head cleaning usually takes 3 to 5 minutes, after the print head cleaning do some test print to see if there are improvements on the print out. If still the same do the head cleaning up to 3x
If Print head cleaning didn’t work proceed to Power cleaning
Power Cleaning
1. Go to System Preference
2. Search Printers & Scanners
3. Look for the model of your printer
4. Select on the printer name then click on options and supplies.
5. Choose utilities then open printer utilities.
6. Click on Power cleaning / Power ink flushing then click on START.
Please note: Rest the printer for at least an hour before doing another test print to check the quality of the printer. If print out problem still persist, contact the following service center for the unit evaluation.
2) Do the Head Cleaning.
If the head cleaning doesn’t work then only do Power Cleaning.
epson L3150 – head cleaning
In my case the head cleaning, didn’t solve the color printing problem.
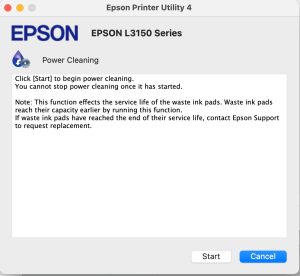
3) Power Cleaning
Choose the Power Cleaning. Epson advises to do it once in 12 hours as it consumes much ink. In my case, it used 5-10% of my black ink.
Epson L3150 power cleaning to solve the color printing problemepson L3150 power cleaning warning noticeepson L3150 – my power cleaning is complete
The Nice Color Printing
After I did the Power Cleaning, now my Epson prints the color correctly.
In my previous post, I was unable to install PHP & MySQL. This time after 2 years, I tried again but still fail, so I decided to use XAMPP to install PHP & MySQL and Apache on MacOS Ventura and it works!
But I had to disable default installed apache2 and change MySQL default port at XAMPP before MySQL and Apache2 can run on XAMPP.
How To Install PHP, MySQL & Apache using XAMPP
1. Download and install XAMPP
Mount the xampp dmg and run it. If you face unknown publish then do Control + Click on the XAMPP installer then run it again.
2. Follow the step by step instruction in installing XAMPP
Just follow the instructions.
3. Run the servers
If you unable to run the MySQL & Apache web server than follow below solution.
xampp macos ventura – mysql and apache webserver unable to start
If you can run MySQL change it default ports. I use 3316 instead of default 3306.
xampp macos ventura – change the default port to 3316
I tried to stop mysql service but MacOS informed no MySQL service was running. Only by changing MySQL default port it works.
xampp macos ventura – mysql not running
If you can’t run the apache2 server, stop default apache2 server by typing at the terminal.
stop apache2
1
sudo apachectl stop
Then run again Apache Web Server at XAMPP.
xamp macos ventura – apache webserver now running
4. Test PHP & MySQL by accessing PhpMyAdmin
If you can access phpMyAdmin and create table or user from phpMyAdmin then your XAMPP installation works!
xampp macos ventura – access localhost and click phpmyadminxamp macos ventura – successful installed php and mysql now can access phpmyadmin
Saya dah lama ingin membeli rumah teres dua tingkat di Denai Alam, cuma ianya agak mahal dan agak susah berdasarkan harga rumah semasa untuk saya cover loan rumah dengan duit sewa rumah.
Jadi saya menunggu peluang untuk dapat rumah yang berpatutan, sehingga lah ada sebuah rumah di Denai Alam yang dilelong pada harga RM485k dan saya berjaya bida pada harga RM530k.
Rumah lelong ini saya beli pada Januari 2023.
iklan rumah lelong di mudah-my
Harga pasaran semasa adalah dalam RM650k – RM700k di kawasan tersebut.
Kajian Pasaran
Sebelum saya bercadang untuk membeli rumah di Denai Alam, saya telah melakukan kajian dari segi
harga sewa semasa
kesenangan untuk mencari penyewa (vacancy rate)
persaingan rumah sewa lain dari segi kemudahan yang disediakan seperti kitchen cabinet etc.
Berdasarkan kajian, saya dapati kena ada kitchen kabinet, kipas siling & lampu (mesti ada). Selain itu saya tambah water heater dan water pump untuk memudahkan saya mendapat penyewa dengan lagi cepat.
Selain itu, vacancy rate adalah dalam 2 – 3 bulan.
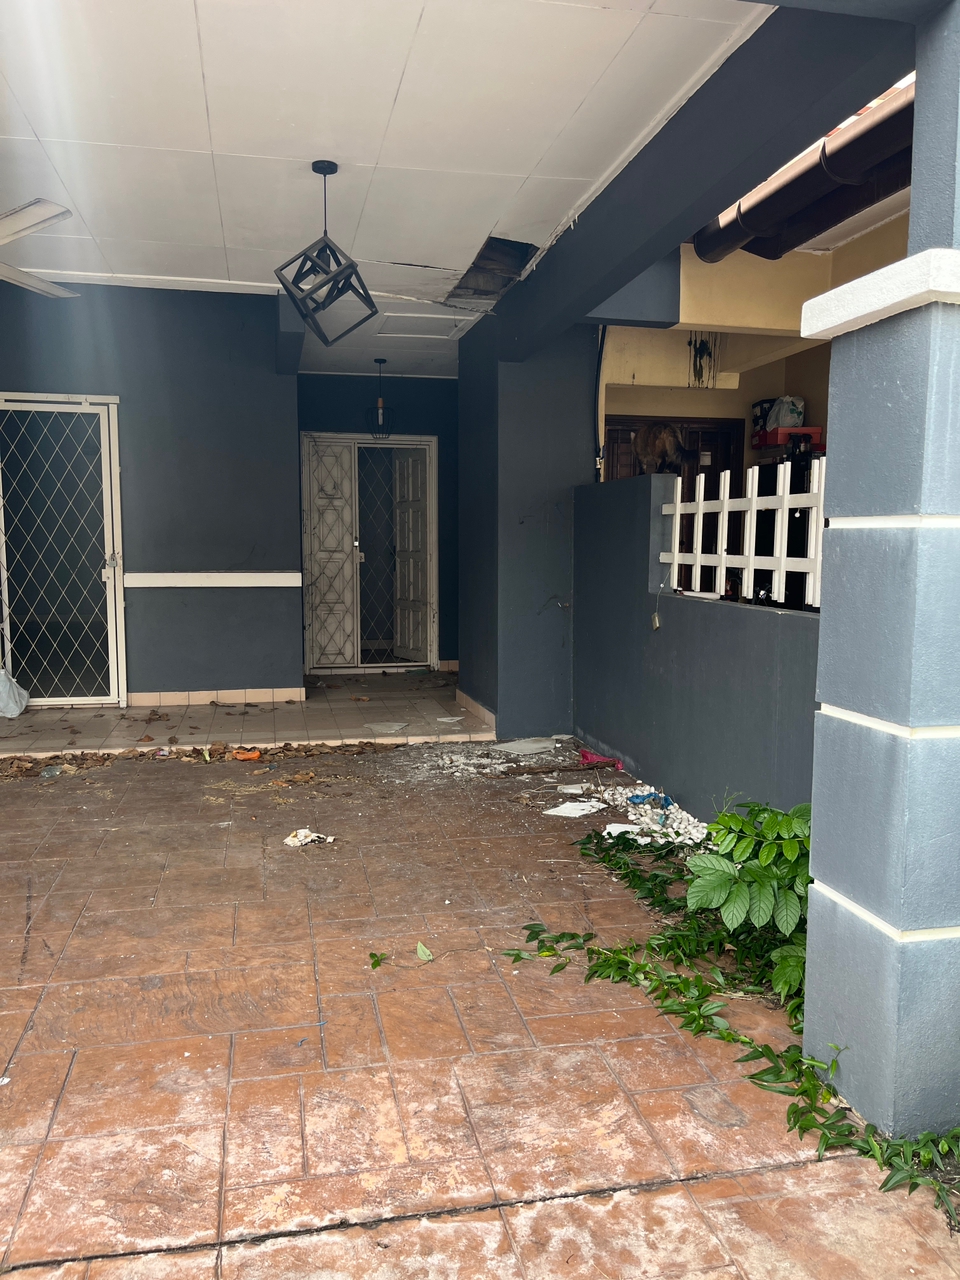
Peluang Rumah Lelong & Lawatan Tapak
keadaan rumah lelong
Rumah ini telah dilelong untuk kali ketiga, menyebabkan harga rizab jatuh kepada RM480k. Bila saya tanya jiran berdekatan, mereka memberitahu pemilik sebelum ini cuba menjual rumah terbabit tetapi disebabkan MCO covid, tidak ada pembeli sampailah dilelong.
Saya dapati rumah terbabit mempunyai grille, kipas dan lampu. Keadaan cat luar macam baru dicat.
Kerosakan yang ketara ialah atap bocor selain itu ada semak samun di depan dan belakang rumah.
Sesi Lelongan Di Talian (online)
Selepas membuat analisis, saya telah mengambil keputusan untuk bida rumah terbabit. Saya sasarkan harga maksimum saya akan bida ialah RM500k.
Saya menang bidaan rumah tersebut pada harga RM530k. Terlebih RM30k! Ini kerana ada 6 orang yang ikut serta lelongan ini.
selepas menang lelong masuk rumah yang kosongkeadaan toilet rumah lelong – masuk rumah selepas menang
Sementara menunggu kelulusan pinjaman bank, saya mula masuk ke rumah lelong tersebut memandangkan rumah tersebut memang kosong pun. Saya ambil gambar kerosakan rumah dan sebagainya. Seterusnya plan renovasi apa yang patut dibuat di rumah tersebut.
Saya sediakan dokumen di mana saya tampal gambar-gambar, ukuran rumah dan skop kerja renovasi.
Saya bagi kepada beberapa kontraktor untuk dapatkan bajet kerja-kerja baik pulih.
Saya lakukan kerja-kerja baik pulih, selepas mendapat kelulusan pinjaman bank walaupun belum sampai langkah “fund disbursement” iaitu di mana bank pinjaman saya membayar baki harga lelong kepada bank yang melelong rumah terbabit.
Tindakan ini agak berisiko, ini kerana kalau bank lambat bayar baki harga lelong, rumah boleh dilelong sekali lagi dan segala kos baik pulih saya sendiri akan tanggung kerugian.
Tetapi saya telah membuat pengiraan di mana saya dapat kurangkan risiko dilelong semula apabila berbincang dengan peguam bank.
Saya juga menukar dengan cepat nama pemilik Air Selangor. Ini kerana bekalan air telah dipotong. Untuk membuat kerja-kerja baik pulih saya perlu sambungkan semula air dengan menukar nama pemilik Air Selangor
Selain itu, saya juga menukar pemilik pengguna TNB. Ini disebabkan TNB telah mengeluarkan notis pemotongan bekalan. Saya juga tidak ingin menggunakan elektrik yang mana akaun TNB masa atas nama pemilik lama kerana jika guna elektrik atas nama pemilik lama macam mencuri pula.
Semua penukaran nama saya gunakan dokumen MOS (memorandum of sale) & POS (proclaimation of sale).
Iklankan Rumah Di Mudah.My
iklan rumah saya di denai alam di mudah.my
Saya dapat siapkan kerja-kerja baik pulih pada 11hb Mac 2023 dan walaupun masih ada sedikit kerja-kerja baik pulih masih berjalan, saya terus iklankan di Mudah.My.
Alhamdulillah, saya mendapat penyewa pada 16hb Mac untuk kemasukan 1hb April 2023. Saya mendapat penyewa dalam tempoh 5 hari.
Dalam kajian saya, saya agak akan dapat penyewa dalam 2 – 3 bulan tapi saya dapat dalam 5 hari sahaja.
Saya rasa ini berkat saya buat yang terbaik dengan buat kerja-kerja baik pulih, bersihkan rumah dan buat renovasi yang membuatkan orang selesa duduk rumah tersebut. Selain itu saya tidak mengenakan bayaran sewa yang tinggi berbanding pesaing-pesaing yang lain.