Epson Ecotank L3150 Install to Macbook M1

I just bought Epson Ecotank L3150 printer to replace my kaput HP printer.

It was a hassle to install the Espon Ecotank because it took time for the printer to self configure. For me it took, around 10 minutes as what the user guide informed.

Ensure that to Start button stays on and nothing is flashing if not you will face error in installing Epson software and driver.

You need to install one software and its driver to configure correctly the printer.

Download the Epson printer and driver

espon ecotank L3150 software and driver

Run the Epson Set up

epson ecotank L3150 first time wifi set up

Just follow step by step instruction then choose Wifi Connection Setup.

Choose Wifi Setup using USB Cable

epson ecotank L3150 use cable for wifi set up


epson ecotank L3150 use cable to connect to printer

Install Printer Driver for Mac

epson ecotank L3150 install driver

Add Printer After Driver Installation

macbook M1 add printer

Select Epson Printer and Use its Epson L3150 Series Driver

macbook M1 use epson L3150 series

If Everything OK, You can start Printing with Epson Ecotank L315 Printer

macbook M1 Epson Ecotank L315 printing panel

Godot MultiPlayer Lobby Tutorial Part 1

I want to do a multiplayer games but it is hard to really understand how it works.

I did refer the official tutorial from Godot here. but I still can’t understand it then I read the code example of multiplayer bomber.

From the multi player bomber, I just extracted when a lobby is created by Host and then a Player joins the lobby.

I did this to simplify the GDScript so I can focus on understanding its inner working.

Besides I add additional print() to see which function is called first and understand their sequence. To know the sequence I added timestamp when the function is called.

Example:

I also rearrange the scripts into different folder to reflect its purposes and change gamestate.gd to GameState.gd

Print at Critical Functions To Detect Functions Calling Sequence

scripts/global/GameState.gd

  • print(“game state – connected_ok()”, ” time stamp: “, OS.get_system_time_msecs())
  • print(“game state – player connected(). ID: “, id, ” time stamp: “, OS.get_system_time_msecs())
  • print(“game state – register player() “, id, ” time stamp: “, OS.get_system_time_msecs())

scripts/lobby/lobby.gd

  • print(“game state – register player() “, id, ” time stamp: “, OS.get_system_time_msecs())
  • print(“lobby – refresh_lobby() Players: “, players, ” time stamp: “, OS.get_system_time_msecs())
  • print(“lobby – _on_connect_success()”, ” time stamp: “, OS.get_system_time_msecs())

A Player Joins As Host @ Server

When a player joins as host, below is the print output.

Launch The Application

  • Run the application via command line (I’m using Linux)
  • Then click Host
Godot Multiplayer Lobby - starting game
Godot Multiplayer Lobby – starting game

Host / Server output:

As you can see, no network signals (network_peer_connected & connected_to_server) are emitted during the network server connections.

Godot Multiplayer Lobby - print output
Godot Multiplayer Lobby – print output

A Player Joins as Client

When a player joins as client, below is the print output.

Godot Multiplayer Lobby - starting as player @ client
Godot Multiplayer Lobby – starting as player @ client

Host / Server output:

Godot Multiplayer Lobby - server print output when a player joins as client
Godot Multiplayer Lobby – server print output when a player joins as client

Player / Client output:

Godot Multiplayer Lobby - print output as player @ client
Godot Multiplayer Lobby – print output as player @ client

Print Output Timestamp Sequence

I rearrange the print out timestamp based on which comes first. Below is the result.

Notes:
The timestamp here differs from screenshots as I did this article in few days, hence the difference in timestamps.

Sequence Diagram

From the “Print Output Timestamp Sequence”, I developed the sequence diagram for better visualization.

Godot Multiplayer Lobby Sequence Diagram

Key Take Aways

  1. A put “remote” if the function is called by rpc_id() or any functions called via rpc
  2. Functions within the same entity e.g Client or Server are executed first.
  3. Function called via rpc() is executed after all functions within same entity is executed.
  4. Even function triggered via emit signal is executed first before rpc()

Resources:

Sample code

MyBayar Saman Promotion 50% until 11th April 2021

PDRM launched new saman portal and mobile application to support their digitalisation effort.

For the new launching, PDRM also gives 50% discount on all summons.

MyBayar Saman Portal: https://mybayar.rmp.gov.my/

Register First

It is easy to register and we only provide necessary information.

mybayar saman registration

List of Summons

Automatically, the portal will provide list of summons after registration. You can view the summon amount after and before discount.

Besides you can see photo of your vehicle from the speed trap camera.

mybayar saman senarai saman

Pay Summons

PDRM provides lots of option for payment from online banking to credit card.

mybayar saman payment methods


Godot Input Event Example

I want to do a simple board game. Lots of things, I don’t really understand, example the input events. I read the Godot documentation on Input Event but they didn’t provide any project example besides the code.

For beginner, it is not straight forward. So I share the project Input Event example based on the Godot documentation example.

Steps To Do

1. Create Godot Project

2. Create New Input Map

– Click Project -> Project Settings

godot project settings

– Choose Input Map tab

godot - input map
godot – input map

– Find ui_right and choose the right key on your keyboard
– Then click OK
– Do the same with ui_left

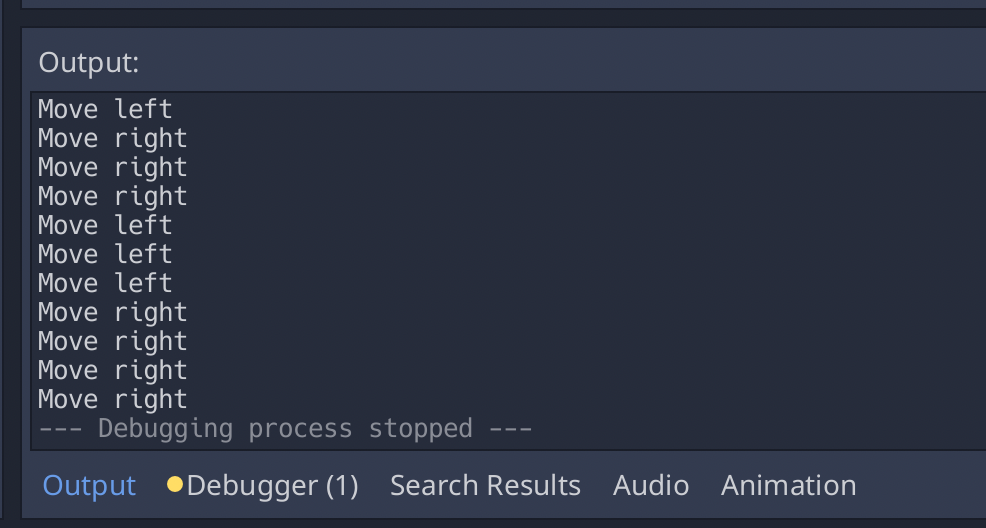
3. Test it, by pressing the keys on your game.

– The text will appear on the output screen

godot - output screen
godot – output screen

Add Custom Input Map – Mouse Left Button Click

1. Go to project -> Project Settings

2. Type ui_mouse_left_button_click (you can give any name)

godot - add new input map
godot – add new input map

3. Click Add

4. Add left button event to the Input Map

godot - mouse left button click input map
godot – mouse left button click input map


godot - added mouse left button click
godot – added mouse left button click