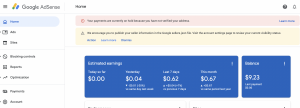
I have Google Adsense account to generate some income for my blogs. After reaching certain amount Google will show notification that needs to verify billing address.
Billing Address Verification Notification
google adsense – notification to verify billing address
According to Google, they have sent the verification address letter on 8th January 2021. I received it today which is 10th February 2021. It took nearly 4 weeks ++.
google adsense – verify billing address
Billing Address Verification Letter
I was happy when I received the verification letter. I told myself if I don’t receive it by this week. I will ask Google to resend the letter.
google adsense – letter frontgoogle adsense – letter backgoogle adsense – letter inside code
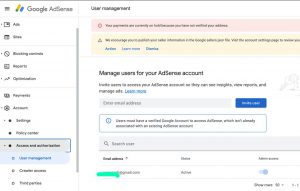
Verify The Billing Address by Entering the Code
Click verify and key in the code inside the letter. Upon success, it will show success status and the verification billing address widget will disappear.
google adsense – click verifygoogle adsense – fill up and submit
What You Will Learn From This Godot Grid Movement Tutorial
How to create player sprite that move in 2D grid
Create Collision walls where the player sprite cannot pass through the wall
Part 2 – Player Sprite Moves within Walls
Create Walls
i. Add child node -> Add TileMap.
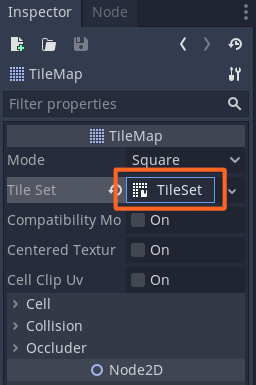
ii. Set Tile Set from empty to new Tile Set.
iii. Double click on new Tile Set to change to Resource tab.
iv. Click “+” add texture (add bottom left)
v. Use the default Godot icon as the wall.
vi. Make the Icon editor window bigger by clicking on the up arrow (bottom right)
vii. Zoom in the tile set by clicking “+” at top right.
viii. Click “New Single Tile” and click grid icon to enable the grid.
ix. Select the icon if selected yellow line will appear.
x. Change color to black by clicking the “Modulate”
xi. Change RGB color to 000000
godot grid movement – create tilemapgodot grid movement – set tile set to new tile setgodot grid movement – double click on new tile set to set the resourcesgodot grid movement – add the resourcegodot grid movement – use default godot icongodot grid movement – click up arrow bottom rigth to make the icon editor biggergodot grid movement – zoom in the icongodot grid movement – click new single tile and enable the gridgodot grid movement – grid enabledgodot grid movement – change color by clicking on modulategodot grid movement – change color to black where RGB 000000
Add Collision to The Wall Tile Set
i. Ensure tile set is still selected (yellow outline)
ii.Click “Collision”
iii. Click the square icon
iv. The select the region within the yellow line.
v. Icon color will change to turquoise if collision is properly set.
godot grid movement – add collision square
Create The Maze
i. Click on player sprite (to go back to player scene)
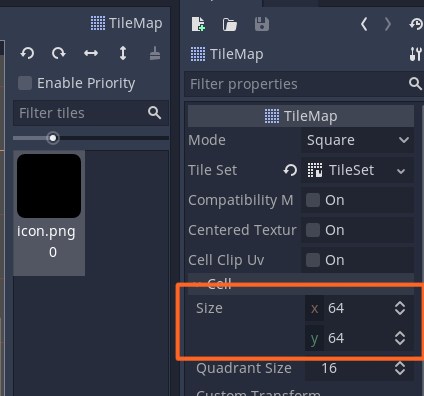
ii. You will see the TileMap is black now.
iii. Check the TileMap is 64×64
iv. Click on TileMap and start populating the walls to create your own maze.
godot grid movement – wall is blackgodot grid movement – ensure size is 64×64godot grid movement – create maze
Add RayCast2D to Player Sprite
i. Right click on Player sprite -> Add child node
ii. Select RayCast2D
iii. Set the RayCast2D
– Position x = 32, y = 32 (to make centre (red plus sign))
– Enable is on
– Cast to y = 32 (to make the down blue arrow to just at the edge of the player sprite)
godot grid movement – create raycast2Dgodot grid movement – set the raycast2D
Update the Player Script
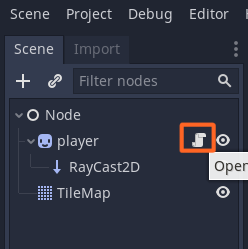
i. Click on the script icon near Player sprite
ii. Update the script based on the code below.
iii. Ensure script indentation is correct.
What You Will Learn From This Godot Grid Movement Tutorial
How to create player sprite that move in 2D grid
Create Collision walls where the player sprite cannot pass through the wall
Part 1 – Make the Sprite Move
Create Node
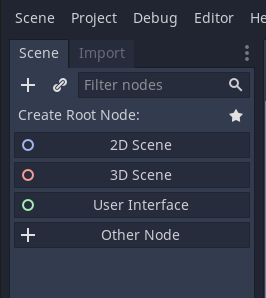
i. Click “Other Node”
ii. Then select “Node”
godot grid movement – create nodegodot grid movement – select node
Create Sprite
i. Right click “Node” -> Add child node
ii. Select Sprite
iii. Drag and drop icon.png into sprite texture at right panel
iv. At sprite panel, untick centered on
v. Click “Scene” (top menu left) then save scene as player.
godot grid movement – create spritegodot gride movement – drag n drop icon to sprite texturegodot grid movement – untick centeredgodot grid movement – save scene as player
Add Script to the Player sprite
i. Right click on Sprite -> Attach Script
ii. Click create on when the window open.
iii. Remove all codes except “extends Sprite”
iv. Copy the code below and paste to the script. Ensure indentation is correct.
godot grid movement – attach scriptgodot grid movement – create script
godot grid movement – remove all codes except extends Sprite
I took the Unifi Mesh Wifi package of RM15 per month for 24 months. It was quite easy to set up just need to install mobile application Deco then follow its step by step instruction.
Tumis macam biasa bahan-bahan di atas mengikut turutan nombor dimana akhir sekali adalah meletakkan ayam atau mutton minced sehingga bahan utama protein tersebut masak secukupnya.
Side filling / toppings
Preparation for Taco fillings
capsicum
japanese cucumber
carrot
shredded cheese
lettuce
rocket leaf
Baby tomato
Thousand island sauce
Honey Mustard
(you can choose to slice match size or any size you prefer)
preheat Taco shells in ovenBaked shredded cheese till melt before putting veggies
you can choose any type of – WRAPS/ BURRITO / TORTILLAS / CORN WRAPS (TACO) mengikut selera. Since my youngest son been dreaming eating TACO… so i made few options because my 2nd son prefer to eat Burritos.
Readymade Taco Shells
Lain orang lain kesukaan tetapi yang penting you can just made one time cook for the same fillings.
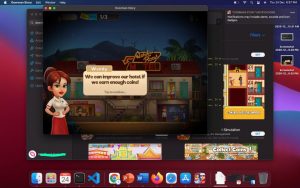
I bought an Apple Macbook Pro M1 in 2nd week of December, 202o. I was excited because know it can play iPad or iPhone games thanks to M1 chip which is similar like iPhone and iPad ARM chip.
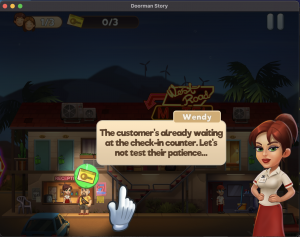
At first after downloading my favorite game Doorman Story, I could play it.
apple macbook pro M1 downloaded iphone gameapple macbook pro M1 – crash while playing iphone game
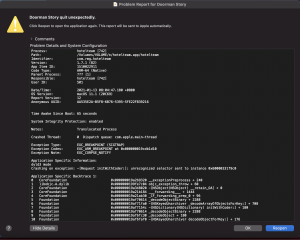
When I wanted to play second time, it produced error as shown in the image. Second time here means, I switched off my Macbook Pro then on it again.
apple macbook pro M1 error in playing iphone games
It is really frustrating as the game won’t load even after few on and off the MacBook. Even after re-installing it doesn’t work. I haven’t try other iPad or iPhone app though.
This new year 2021, Genting has so thick fog from night till morning. It is really pleasant view for anyone who rarely experience this kind of thick fog.