
I converted this Godot Grid Movement Video Tutorial into textual tutorial because I feel it is much easier to follow textual tutorial.
This is Part 2, you can view Part 1 here.
What You Will Learn From This Godot Grid Movement Tutorial
- How to create player sprite that move in 2D grid
- Create Collision walls where the player sprite cannot pass through the wall
Part 2 – Player Sprite Moves within Walls
Create Walls
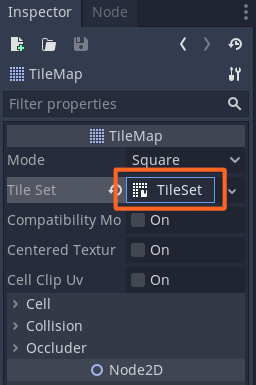
i. Add child node -> Add TileMap.
ii. Set Tile Set from empty to new Tile Set.
iii. Double click on new Tile Set to change to Resource tab.
iv. Click “+” add texture (add bottom left)
v. Use the default Godot icon as the wall.
vi. Make the Icon editor window bigger by clicking on the up arrow (bottom right)
vii. Zoom in the tile set by clicking “+” at top right.
viii. Click “New Single Tile” and click grid icon to enable the grid.
ix. Select the icon if selected yellow line will appear.
x. Change color to black by clicking the “Modulate”
xi. Change RGB color to 000000


Add Collision to The Wall Tile Set
i. Ensure tile set is still selected (yellow outline)
ii.Click “Collision”
iii. Click the square icon
iv. The select the region within the yellow line.
v. Icon color will change to turquoise if collision is properly set.

Create The Maze
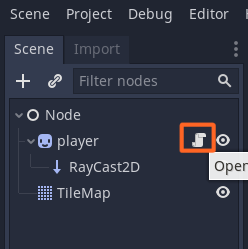
i. Click on player sprite (to go back to player scene)
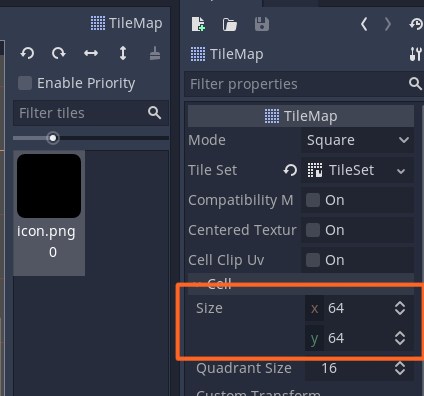
ii. You will see the TileMap is black now.
iii. Check the TileMap is 64×64
iv. Click on TileMap and start populating the walls to create your own maze.


Add RayCast2D to Player Sprite
i. Right click on Player sprite -> Add child node
ii. Select RayCast2D
iii. Set the RayCast2D
– Position x = 32, y = 32 (to make centre (red plus sign))
– Enable is on
– Cast to y = 32 (to make the down blue arrow to just at the edge of the player sprite)


Update the Player Script
i. Click on the script icon near Player sprite
ii. Update the script based on the code below.
iii. Ensure script indentation is correct.
|
1 2 3 4 5 6 7 8 9 10 11 12 13 14 15 16 17 18 19 20 21 22 23 24 25 26 27 28 29 30 31 32 33 34 35 36 37 38 39 40 41 42 43 44 45 46 47 48 49 50 51 |
extends Sprite var speed = 256 var tile_size = 64 var last_position = Vector2() var target_position = Vector2() var movedir = Vector2() onready var ray = $RayCast2D func _ready(): position = position.snapped(Vector2(tile_size, tile_size)) last_position = position target_position = position func _process(delta): #MOVEMENT if ray.is_colliding(): position = last_position target_position = last_position else: position += speed * movedir * delta if position.distance_to(last_position) >= tile_size - speed * delta: position = target_position #DELTA if position == target_position: get_movedir() last_position = position target_position += movedir*tile_size func get_movedir(): var LEFT = Input.is_action_pressed('ui_left') var RIGHT = Input.is_action_pressed('ui_right') var UP = Input.is_action_pressed('ui_up') var DOWN = Input.is_action_pressed('ui_down') movedir.x = -int(LEFT) + int(RIGHT) movedir.y = -int(UP) + int(DOWN) if movedir.x != 0 && movedir.y != 0: movedir = Vector2.ZERO if movedir != Vector2.ZERO: ray.cast_to = movedir * tile_size / 2 |


Run The Game
i. Click Play icon (top right)
ii. Now you can see the player sprite can’t pass through the walls.